In this section, you will verify the ability to communicate with the WARP FPGA board over the USB link established in the previous section.
The iMPACT software application supports communication (including FPGA configuration) between a computer running IMPACT and devices on the WARP FPGA board configured in a "scan chain". In such a chain, serial data is fed from the output of each device to the input of its nearest downstream neighbor. The first and last devices in the chain are connected back to the PC via dedicated USB boundary scan circuitry on the WARP FPGA board. Establishing communication via this link is a critical first step in utilizing the WARP hardware.
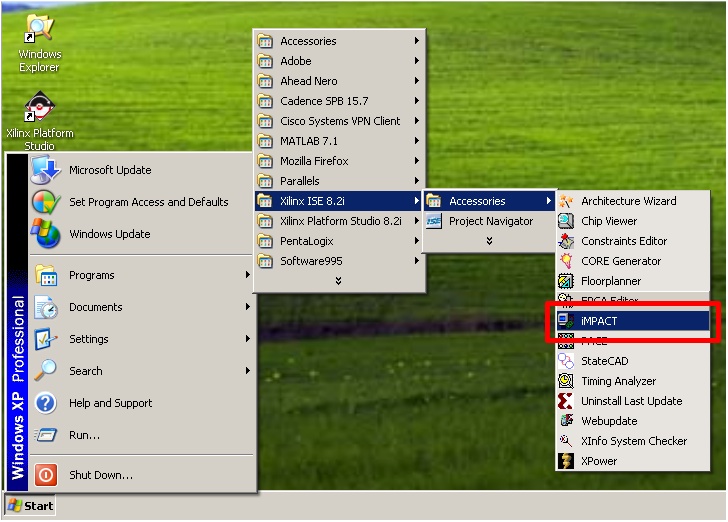
Open the Xilinx iMPACT application.
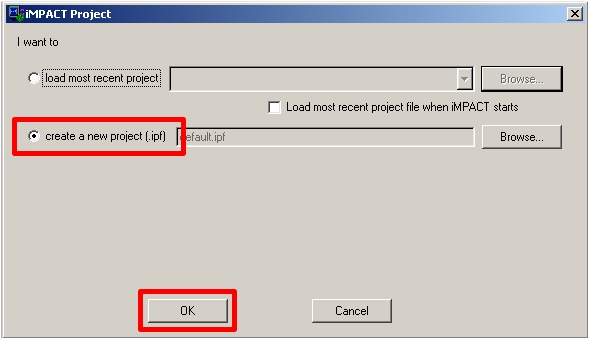
In the "iMPACT Project" window, select the option to create a new project, then click OK.
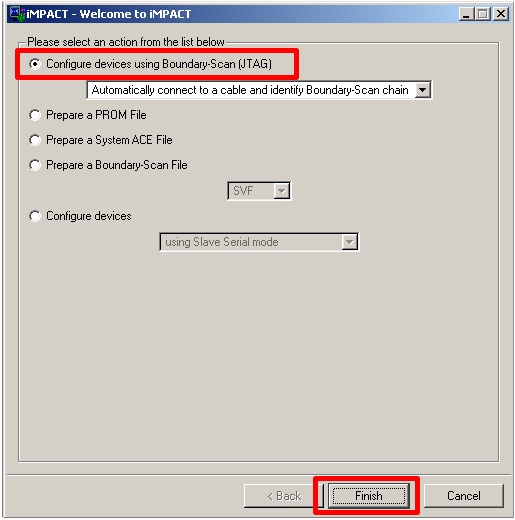
At the "Welcome to iMPACT" window, select the option to configure devices using boundary scan, then click FINISH.
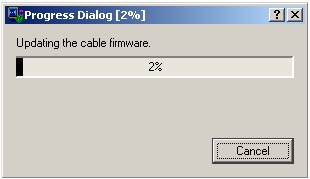
If the USB firmware on your WARP FPGA board needs to be updated, you will receive a warning that its firmware must be updated. Click OK to enable the firmware update. If the USB firmware on your WARP FPGA board is current, then the firmware update will be skipped.
A progress dialog window will appear to indicate completion percentage for the firmware update.
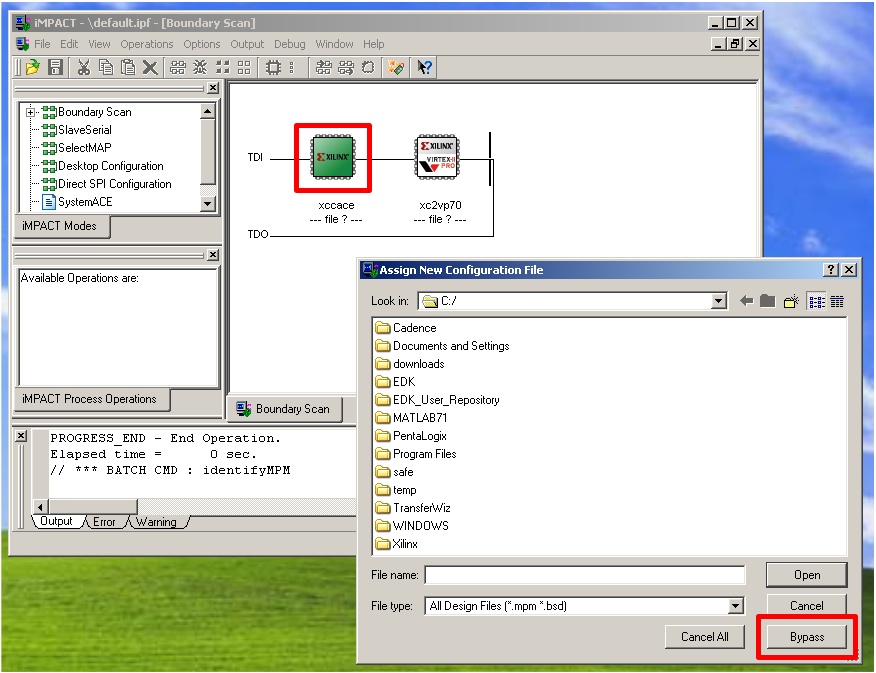
Once the firmware update has been completed (or if no firmware update was required), the iMPACT main window will display a graphical representation of the two devices in the WARP FPGA board's scan chain. The first device in the chain (an XCCACE device) will be highlighted, and a window will appear for assignment of a configuration file to this device. Since this example does not configure the XCCACE device, click BYPASS in the assignment window.
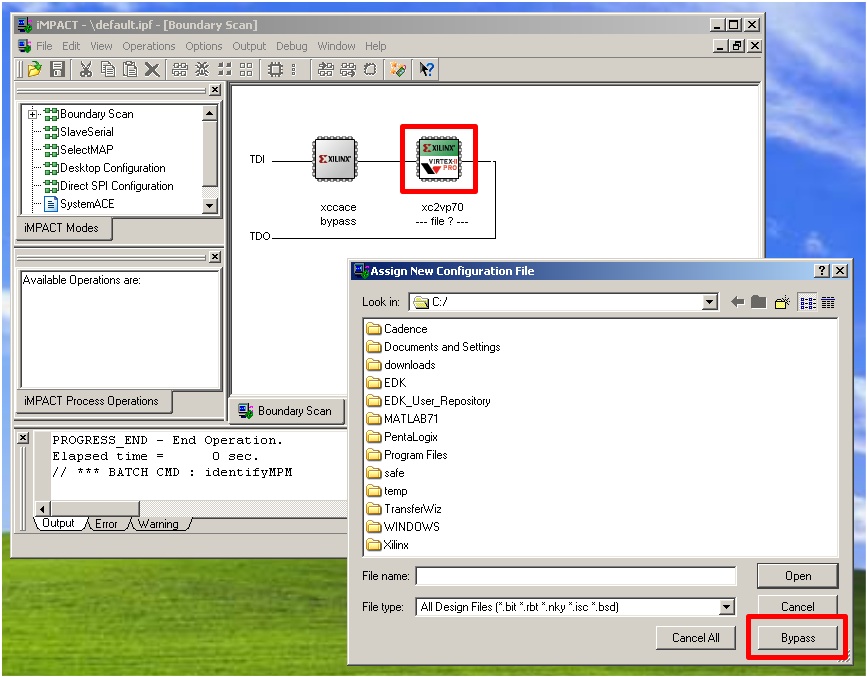
The second device in the chain (an XC2VP70 FPGA) will now be highlighted, and a new window will appear for assignment of a configuration file to this device. Again, since this example does not yet configure the FPGA device, click BYPASS in the assignment window.
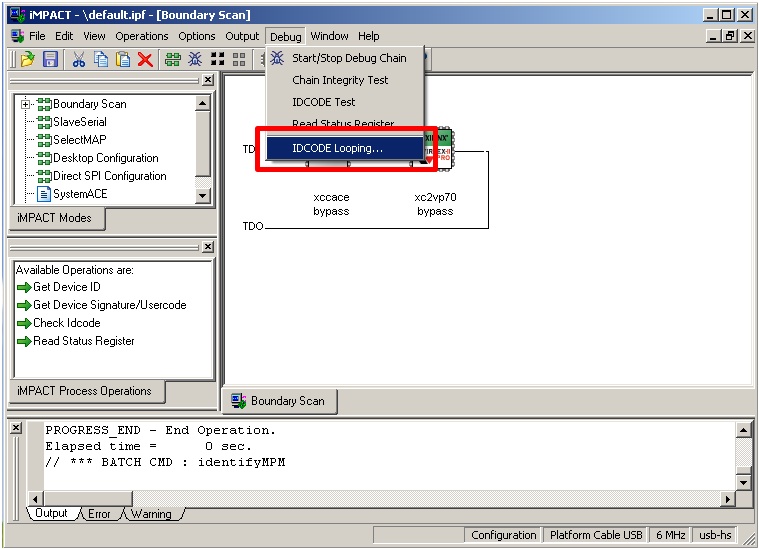
If the second device in the chain is not selected, click on it to select it. You will now verify the ability to communicate via devices in the boundary scan chain by repetitively reading the ID code of a specific device. From the Debug menu at the top of the main iMPACT window, select "IDCODE Looping...".
A dialog box will appear to specify the number of iterations. Enter the desired number of test iterations, then click OK.
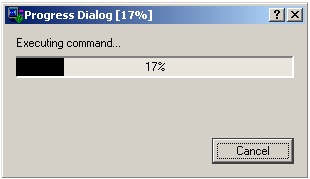
A progress dialog window will appear to indicate the number of loops completed.
After the test has been completed, the status will be displayed briefly in the main iMPACT window.
At this point, you have successfully established a basic communication link between the PC and the WARP FPGA board. Later, this same communication link will be used to configure the FPGA device (download a program to it). Close iMPACT. You may leave the board's Main Power switch in the ON state and you may leave the USB cable connected.
